Sample Preparation
Ok, so assuming you read Sample Collection you can now prepare your sample to be viewed in your microscope.
Here I present two techniques that you can use to prepare your sample. There are other techniques that exist but these are the standard and easiest for DIY approaches.
I prefer the first technique as it produces more biota on the slide to analyze but it has potential draw backs. Most notably if you press too hard onto the slide you risk damaging the cells present on the applicator resulting in a sample that may look worse than it actually is, for example if you pressed down hard and glide (instead of rolling your applicator) your sample along the slide you risk damaging the epithelial cells and producing a sample that may give you false indications of what's going on. Cytolysis (destruction of epithelial cells() is a sign of Cytolytic Vaginosis.
Reminder to not touch the surfaces of the glass slide or slide covers or you risk contamination. Always grab the slides and covers by their edges. You can use gloves if you don't trust yourself.
Technique 1
-
Take your sample that you collected and press it gently to the surface of the glass slide being careful to not apply too much pressure. It really doesn't take much pressure at all. Roll the applicator along the slide to cover a large enough area to view in the microscope. You should be able to visually see the discharge spreading on the slide. You don't need to cover the whole glass slide, only an area large enough to be covered by the glass slide cover.
-
Using a dropper or if your stain/saline solution bottle has a nipple on it already carefully put 1 drop on top of the area that you applied you sample. Be careful to not contaminate your stain/solution. The drop should fall to the slide. If you touch the slide while the drop is still on the bottle you can contaminate your stain/solution as the surface tension of the fluid will draw up anything on the slide into the bottle.
-
Cover the stain and sample with a glass slide cover. I recommend that you drop it onto the sample from a short distance. This reduces the chance of bubbles being trapped between the slide and cover.
- Your sample is ready to view. Continue on to Wet Mount Viewing to start your analyses.
Technique 2
This technique has you apply the stain or solution to the glass slide first and then introduce your collected sample. It reduces the chances of contaminating your stain/solution but it does not yield as much biota on the slide as technique 1 so it is my least preferred method.
-
Apply 1 to 2 drops of saline or stain solution to the surface of your slide. The applicator may soak up some of the solution on the slide. So this may take some practice on how much solution to apply to the slide prior to step 2.
-
Take the sample that you collected and lightly submerge it in the solution on the slide. You can roll it gently to get more biota to be pulled into the solution.
-
Cover the stain and sample with a glass slide cover. I recommend that you drop it onto the sample from a short distance. This reduces the chance of bubbles being trapped between the slide and cover.
- Your sample is ready to view. Continue on to Wet Mount Viewing to start your analyses.
Multiple samples per slide
Ok so now you know how to prepare your slide lets talk about being efficient. I usually put down two areas of samples on one slide and apply different stains or solutions to one slide. For example one sample will be stained with Methylene Blue and the other with KOH if I am looking at CV and checking for Candida at the same time.
This saves on glass slide consumption and you don't need to swap anything out of the microscope. In theory you can fit 3 sample areas per slide but this is a little cramped and your solutions may bleed into each other.
Each sample area will need its own slide cover.
Figure 1.
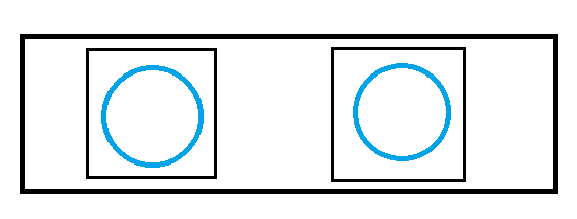
The blue circles are the sample that you applied to the slide via technique 1 or 2. The small black squares are the glass slide covers. And the large rectangle is the glass slide.
Technique # 3 Heat Fixing
Heat fixing the sample to the slide is very helpful to achieve clear images for diagnostics. This may take some practice to get right. I recommend that you try it a few times when you start out to get the hang of it.
Material needed:
To do heat fixing you will need a flame heat source. Ideally a Bunsen burner or alcohol lamp - this is because they burn clean and don't produce much soot. However, you don't have to have it. In the example below I use a simple candle lighter as my heat source.
You will also want to use something to hold the glass slide as you heat it so you don't burn yourself. You can use a clothespin, small tongs, tweezers, or what ever allows you hold the slide firmly and away from your skin.
And lastly is another item that you don't necessarily need but it can make life a little easier is a wash bottle. This will help you to wash the slide in the last step without making a big mess or potentially over washing your sample. Here is a link to a wash bottle for reference.
Steps
- Put a drop of sterile (saline or distilled) water onto the slide.
- Apply the sample that you have collected to the slide by submerging into the water and rolling it lightly across the glass slide. If you have already been prepping your slides using one of the earlier techniques then apply the sample in the same method as you did then.
- Hold the end of one of the microscope slides with your tweezers and pass the slide over the flame from a heat source. Move the sample over the heat source in a circular motion. Be sure to keep the flame from being directly under the sample. We do not want to cook the sample. If you see the water boil it means that its way to hot - I recommend you start with a fresh sample if this happens. If you look closely at the sample while you heat it you can watch the edge evaporate. This is how I have learned to gauge if the slide is hot enough or not. The edge should be evaporating at a constant rate. Typically, after getting the glass to a temperature hot enough to make the water evaporate, it takes only a minute or so for the sample to be fully fixed. If you see water evaporating very quickly remove it from the heat source and allow it cool down before applying heat again. If done correctly the water should evaporate and the bacteria should adhere to the surface of the microscope slide.
Flame movement

- **Allow the microscope slide to cool before proceeding.
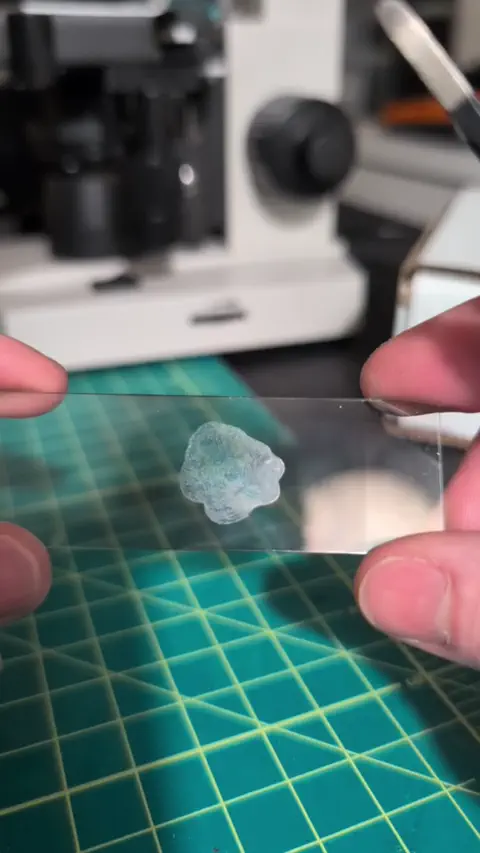
This is what the slide should look like after its cooled
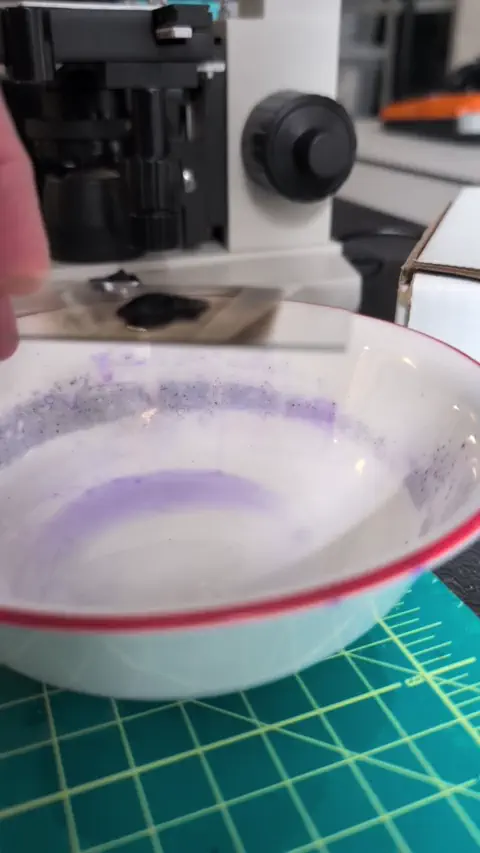
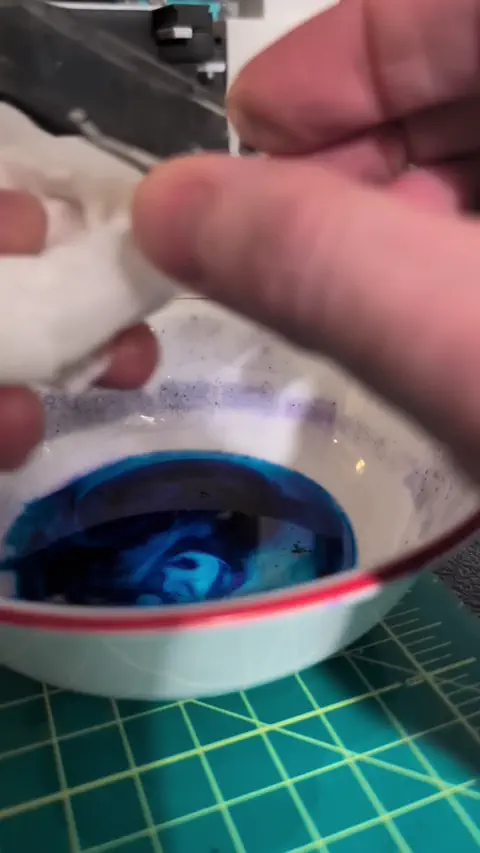
- Take your methylene blue dye and place enough onto the slide to completely cover the sample. Allow it sit like that for 1 minute.
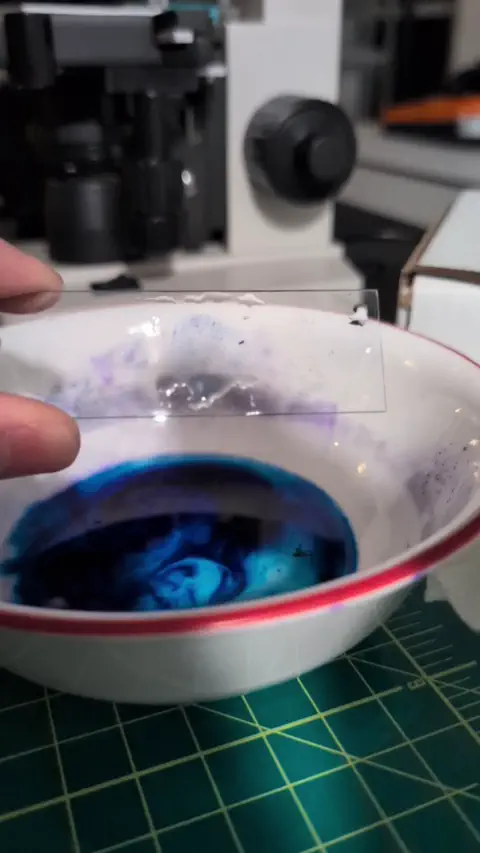
- Wash away the methylene blue using distilled water. Do so by holding the slide at an angle over a sink or reservoir and running water slowly over the sample. In the example below I am using a wash bottle. This allows me to focus the water above the sample allowing the water to wash over the top of the sample at a slow rate. Do not spray the sample directly. This will wash too much of it away from the slide. I spray it until the water runs clean. If you do not have a wash bottle use something that allows you pour the water slowly over the slide.
Start your flow of water above the sample
- Since I used a butane lighter I have a bit of soot on the back of the slide - using clean paper towels I carefully remove it. Not doing so will (overtime) make your microscope stage dirty and it could prevent good light transmission through affecting image quality and clarity.
- Look at your slide and make sure that you can see that a stained sample made it through the process. You can now put it in your scope and view it. No need for a glass slide cover with these. And if you are using oil immersion lenses you can put the oil directly onto the sample while viewing. This should make identifying smaller organisms easier. Slides that are heat fixed can also be stored for longer if you wanted to keep one as reference. Usually no more than a day or two unless you put a seal on it, like Glycerol.