Wet Mount Viewing
Ok so now that sample collection and preparation are out of the way lets get to viewing them in the microscope.
-
Load the glass slide onto the stage. Ensuring the glass slide is firmly held in place by the stage holder or clips.
-
Starting at a low objective lens magnification (10X or so) bring your sample into focus using the course and fine adjustment knobs. See troubleshooting below for more information if you having issues.
See gif on focusing on the cells.
As you switch between your objective lens to increase or decrease magnification you will also need to adjust your diaphragm and condenser if your microscope has one. These two work in conjunction to bring your sample into clarity. Below is a table reference for where to set these for the objective lens you are using.
As you adjust the condenser you will see light aberration through the eyepiece. You want to adjust its height to reduce the amount of aberration apparent while viewing the sample.
Example of aberration
Condenser Adjustment
The diaphragm will adjust the contrast. You may not see much difference at higher magnifications so play around with it - your goal is to get enough contrast to see the lactobacilli and epithelial cell walls clearly.
Diaphragm Adjustment
Table 1 - Objective and Condenser settings for objective lenses
| Objective Lens | Condenser Height | Diaphragm Setting | Why |
|---|---|---|---|
| Low (4x, 10x) | Lowered | Mostly closed | To increase contrast and avoid flooding the image with light. |
| High (40x, 100x) | Raised fully | More open | To provide adequate illumination and resolution for detailed views. |
- Now that you have located the sample on the slide and brought it into focus you can now zoom in to take a closer look. Increase your objective lens to 40X and refocus and adjust your condenser height and diaphragm as appropriate. This is all there is to it. See sample identification below to make an assessment of your sample.
You wont need to go to 100X objective lens magnification for our purposes here. But if you want to and your microscope is able to then I must mention that most microscopes require oil immersion for 100X objective lenses. This immersion oil is applied to the top of the glass slide cover. While switching (rotating the objective lens on some microscopes) put 1 drop of immersion oil to the top of the glass slide cover. Without the immersion oil you wont be able to focus on the sample at all. This immersion oil cannot be used on any other objective lens so only do this as your last examination step as going down in magnification will no longer work as the oil will be obscuring your sample and if non-immersion lenses touch the oil you risk damaging them.
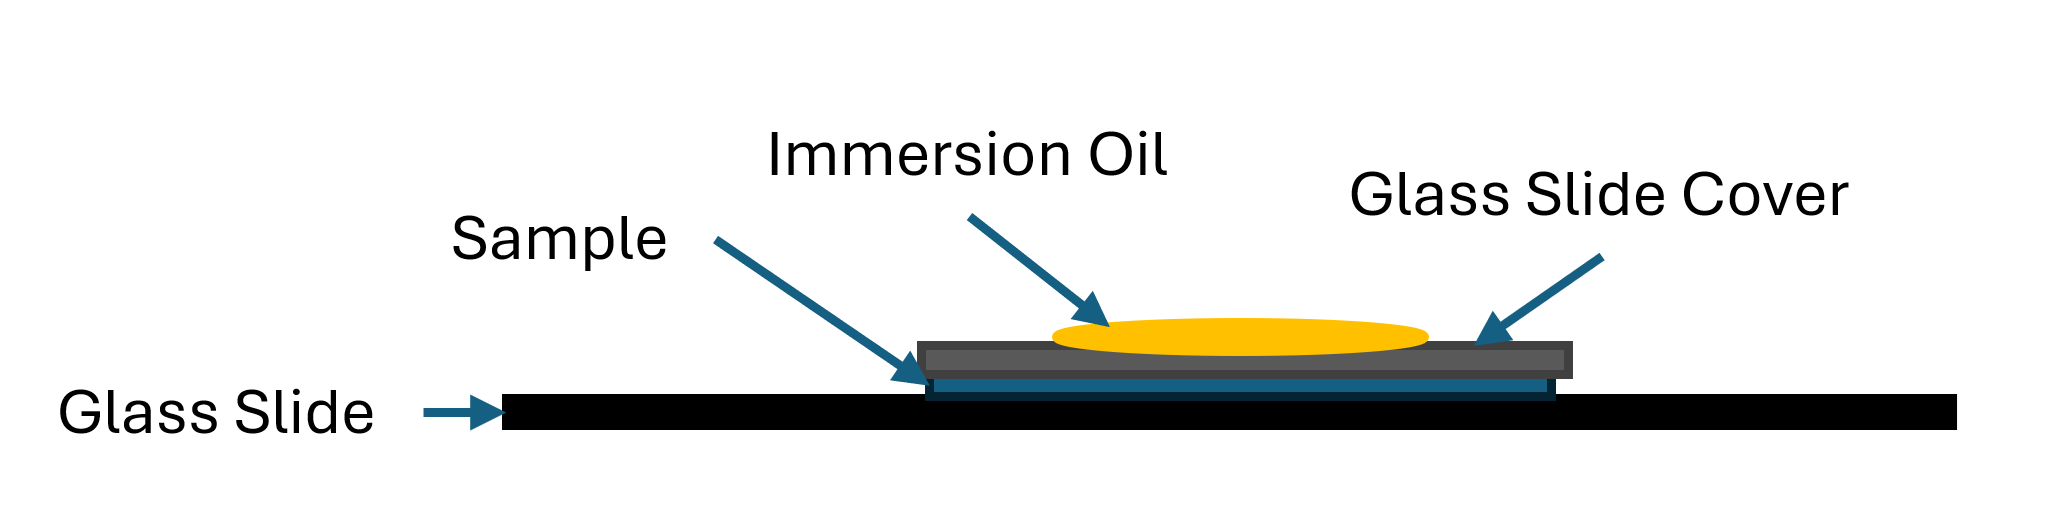
UPDATE 13 Nov 2025 if you heat fix your sample you do not need a glass slide cover for oil immersion.
Oil Immersion Example
Sample Identification
I recommend that you refer to the ISSVD report that can be found here for more information. I will cover the basics below.
In the image below you can see references to some sample collections to give you an idea of what you may be seeing in your slide. These are not stained with methylene blue so if you are using that stain your sample will be darker and blue.

image source ISSVD
Healthy Epithelial Cells
A healthy epithelial cell will look like a fried egg. It will have a clear nucleus and cell wall.
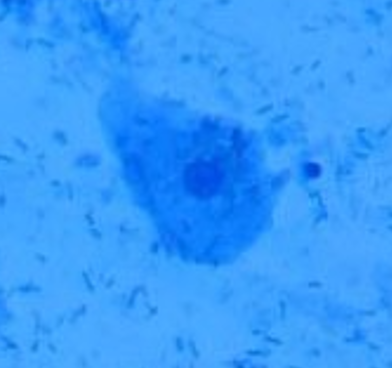
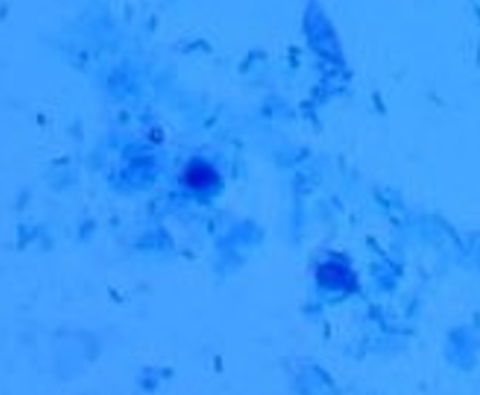
Damaged Epithelial Cells
Epithelial cells that have suffered cytolysis damage from lactobacillus (indicator of cytolytic vaginosis) are identified by seeing free floating cell nucleuses with no cell wall. If you are using methylene blue this is easy to recognize as the nucleus will be a solid blue circle. Usually on the slide you will the plasma from the cell wall spread out on the sample. It looks like a thick mucus with no discernable form or structure.
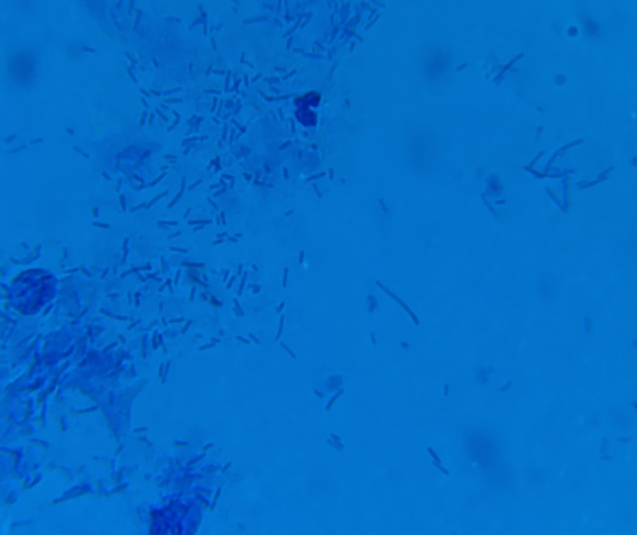
Lactobacillus
Lactobacillus are small rod-like bacteria. They can be found as individuals or forming short chains as they procreate. Note that excessively long or malformed lactobacilli are a sign of lactobacillosis (leptothrix) - see the ISSVD paper for more information.
Leukocytes (white blood cells)
Usually present if there is an infection. CV does not usually present as an infection and so you wont normally see them in your sample if you are suffering from CV. But that doesnt mean you wont happen across them from time to time. Below are some images of them for reference.
These are usually easily identified if using methylene blue stains. The lymphocyte can be confused with the nucleus of an epithelial cell but notice that a lymphocyte has a small cell wall while a healthy epithelial cell has a larger wall while the damaged cells have no cell wall at all. It can take some practice distinguishing between the two but the lymphocyte is also slightly smaller than the epithelial cell nucleus.

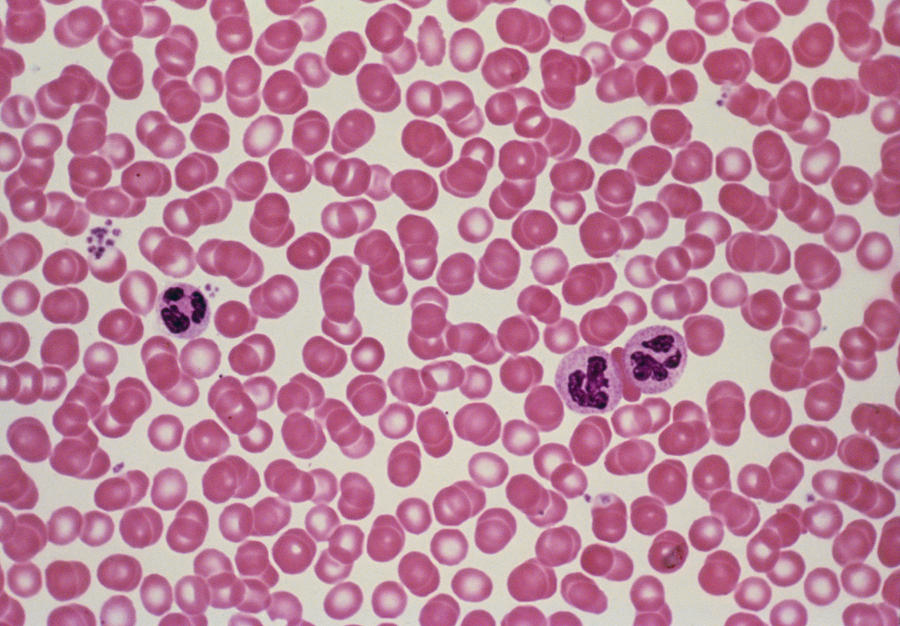
Red Blood Cells
If you are menstruating you may catch a few of these. They are easily identifiable as they will be small perfectly round cells with no nucleus. They are smaller than the nucleus of an epithelial cell. If you are not menstruating and see them then discuss this with your doctor. Blood in these samples is not something that is considered normal when not menstruating.
Image that has both red blood cells and white blood cells.
Other things you may see
There may be other things you see in your sample depending on what's occurring.
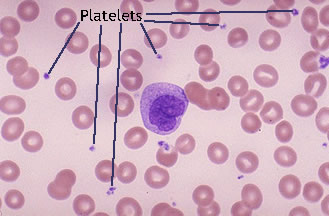
If you are menstruating you may see platelets in the sample. These will be very small black dots floating in the sample. They wont be attached to the epithelial cell walls. If you see small black dots on the edges of an epithelial this it may be an indicator of BV as that bacteria will attack the cell walls. Refer to the ISSVD paper for examples of BV.
Platelets will often looks like they are vibrating while viewing them.
Example of BV to help you to differentiate between platelets and BV.
Troubleshooting
If you are having difficulty focusing on the sample be sure to check that your condenser and diaphragm are set correctly, if you have them. Also be sure to adjust your eye pieces. They usually have a focusing element that you adjust by rotating the lenses. This allows a user to adjust the focus based on their own eyesight (ie if you wear glasses expect to need to adjust this).
If you see a bunch of cracks then you are not focused on the sample but you are focusing on the glass slide or cover. Keep moving the course adjustments until you see the sample and then use fine adjustments from there to bring it into clarity.
If things are just not focusing at all be sure to check that the objective lenses are screwed in tight to the body of the microscope. These can come lose and it will prevent a clear image if they are not seated completely. If these are set firm and the eye pieces are too then you can try using kimwipes (materials) on the objective and eye piece lenses to clean them of any debris or oils.
If you are only seeing black then your objective lens is either not in place fully (if you have a rotating objective lens) or your light source is turned off.